.png?height=120&name=grit42_Yellow(logo).png)
This is a complete guide showing how to prepare and run a complex in vivo study with dosing groups, activities etc
Create an InVivo experiment
Go to the “Setups” page, then create a NEW setup, and make sure to select the “Study simple” (wplugstudysimple) or the “Study” (wplugstudy) plugin depending of what detail you want to register your invivo studies.

- The Study plugin allows for registration of animal groups, activities related to the study, in-life gathering of data for individual animals, unique sample registration and registration and display of sub-experiment results.
- The Study simple plugin only allows for registration of animal groups, activities related to the study, and registration and display of sub-experiment results.
It is possible to customise the parameters belonging to the Group tab in your study. To do this, go to the “Parameters” tab in the setup, and add or edit the parameters having the experimental role of “Independent Variable” (IV). To control what parameters are grouped together in the Group tab, use the “Group name” on the parameter.

Then go to the “Experiments” tab or “Experiments” in the navbar and click on the plus to create a new empty Experiment.

Fill out the details and click “Create experiment”
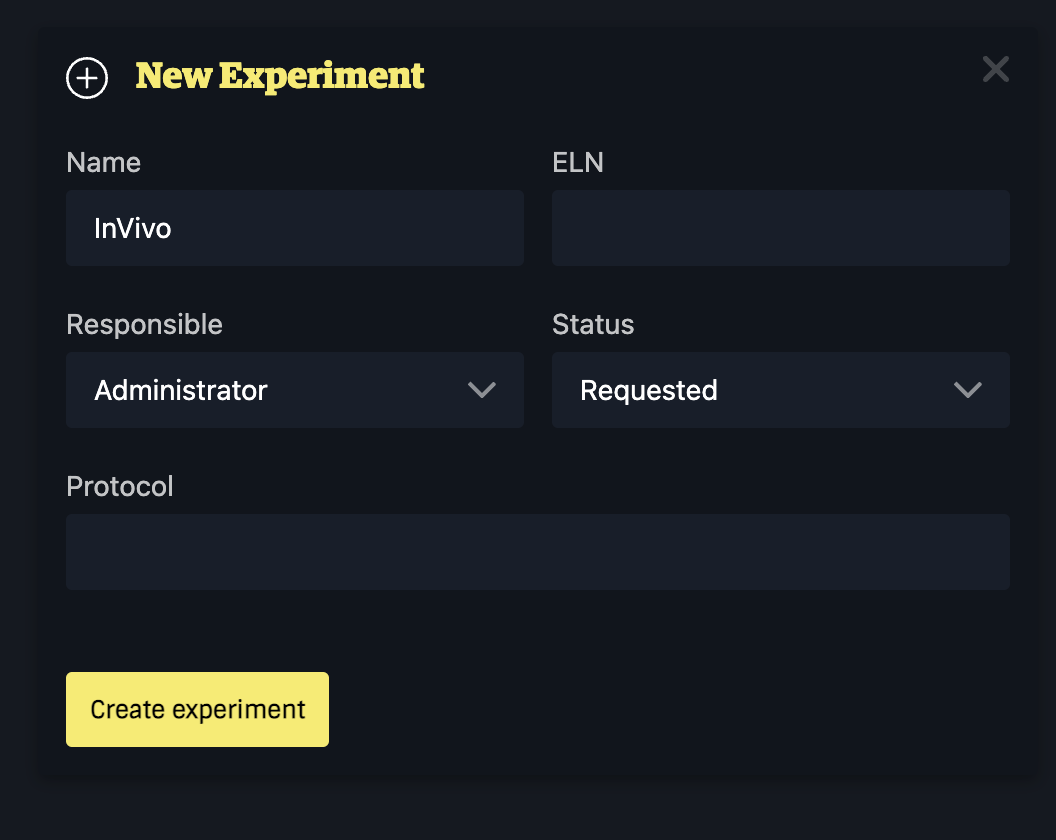
If you are creating a new experiment from the “Experiments” page, you also have to choose the setup.

Groups (Invivo & Invivo light)
To initiate the creation of the “study design” you have to create your animal groups. You do so by going to the “Groups” tab and clicking on the “New” icon in the toolbar.

Fill out the details of your animal group, and make sure to specify the amount of animals it contains.

When all groups are created, click the “Generate animals” button. This will generate the animals in the “Activities” overview.
Exporting and importing groups
It is possible to export groups for import into another InVivo study. Simply click on the top-left Export icon in the toolbar. To import, click the top-left Import icon and choose Import raw data. grit42 will take you to the data importer, where you have to match columns to the parameters in the setup.
Activities (Invivo & Invivo light)
The animals have now been created in the overview on the “Activities” tab. In the table below you can see the groups and the amount of animals you’ve generated in the “Groups” tab.
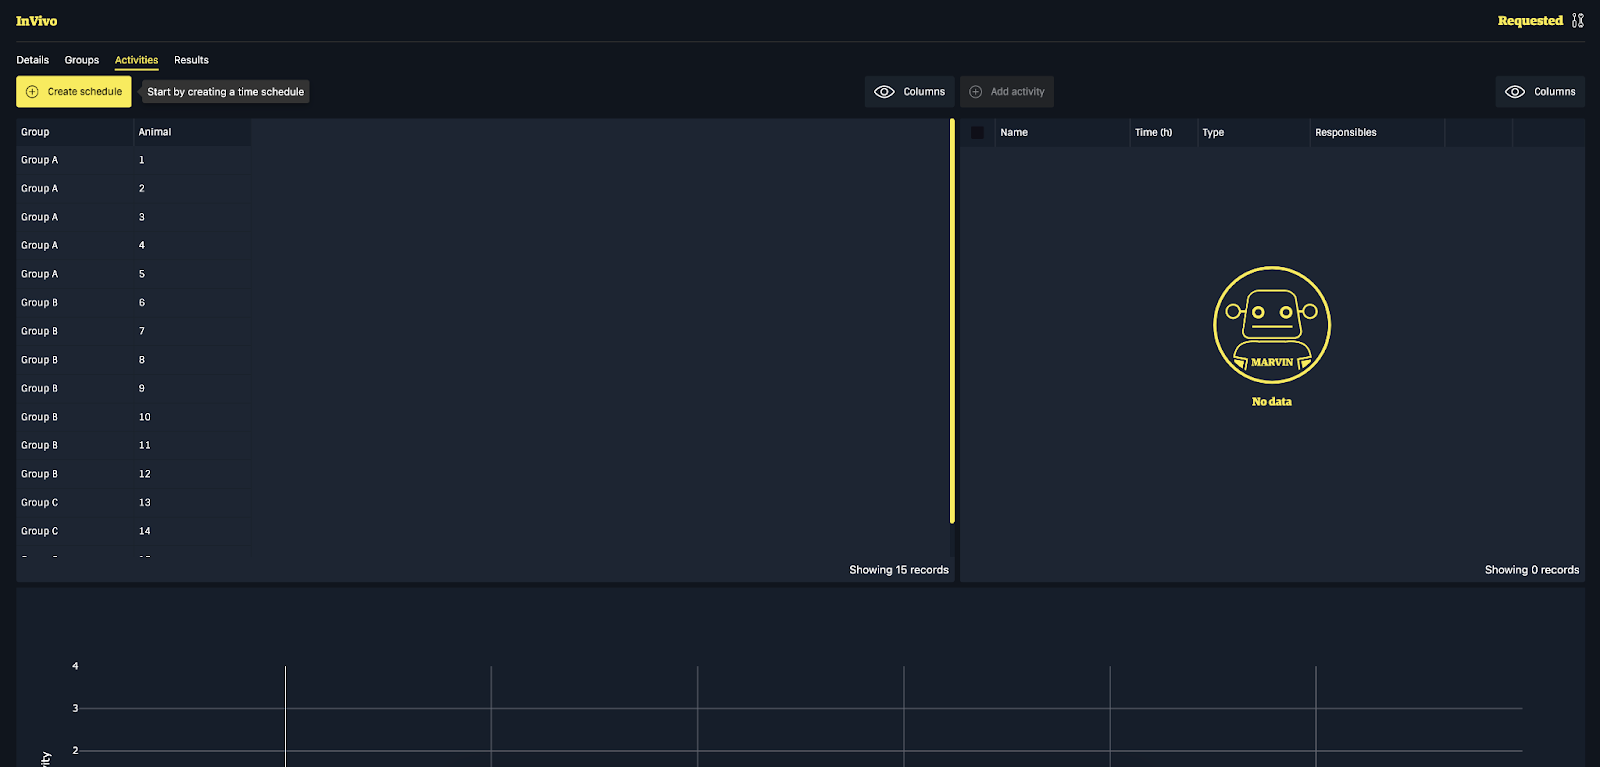
You then need to create a time schedule, this specifies when the experiment starts, so the individual timepoints of the activities can be calculated relative to the starting time.
Click the “Create schedule” button…

…and add the start time of the study.

When a start time has been chosen, you will be able to add new activities.

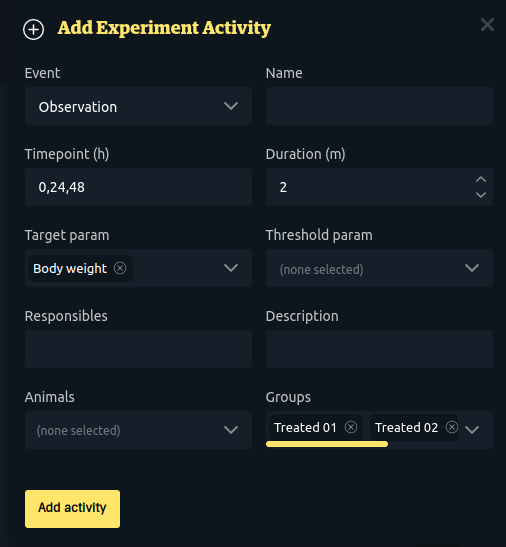
In the appearing form you need to select the kind of event the activity is, and when it is going to happen relative to the selected “Start time”.

Event: What type of event is the activity? When choosing specific event types, you might get some extra fields to fill out. The possible event types are:
- Challenge
- CMS
- Dose
- Observation (In the full version of the Invivo app, this will add columns to the In-life table)
- Other
- Pretreatment
- Sample (In the full version of the Invivo app, this will add samples to the Samples table)
- Termination
- Treatment
Name:
Select a name for the activity, leave it blank to just select the same as the event type.
Timepoint (h):
Relative to the start time in hours, you can choose what time you want the activity to be executed.
Tip: If you want the same activity to be repeated multiple times, you can make this field a list of timepoints, by separating the numbers by a comma. This will create a new activity for each timepoint.
Duration: How long do you expect the activity to last per animal, in minutes?
Responsibles: Specify who this activity concerns either with initials og their name.
Description: Describe the activity
Animals and Groups:
Choose which animals and or groups you want to apply the activity to, one animal or group needs to be selected.
Click on the “Add activity” button, when all the necessary information has been entered.

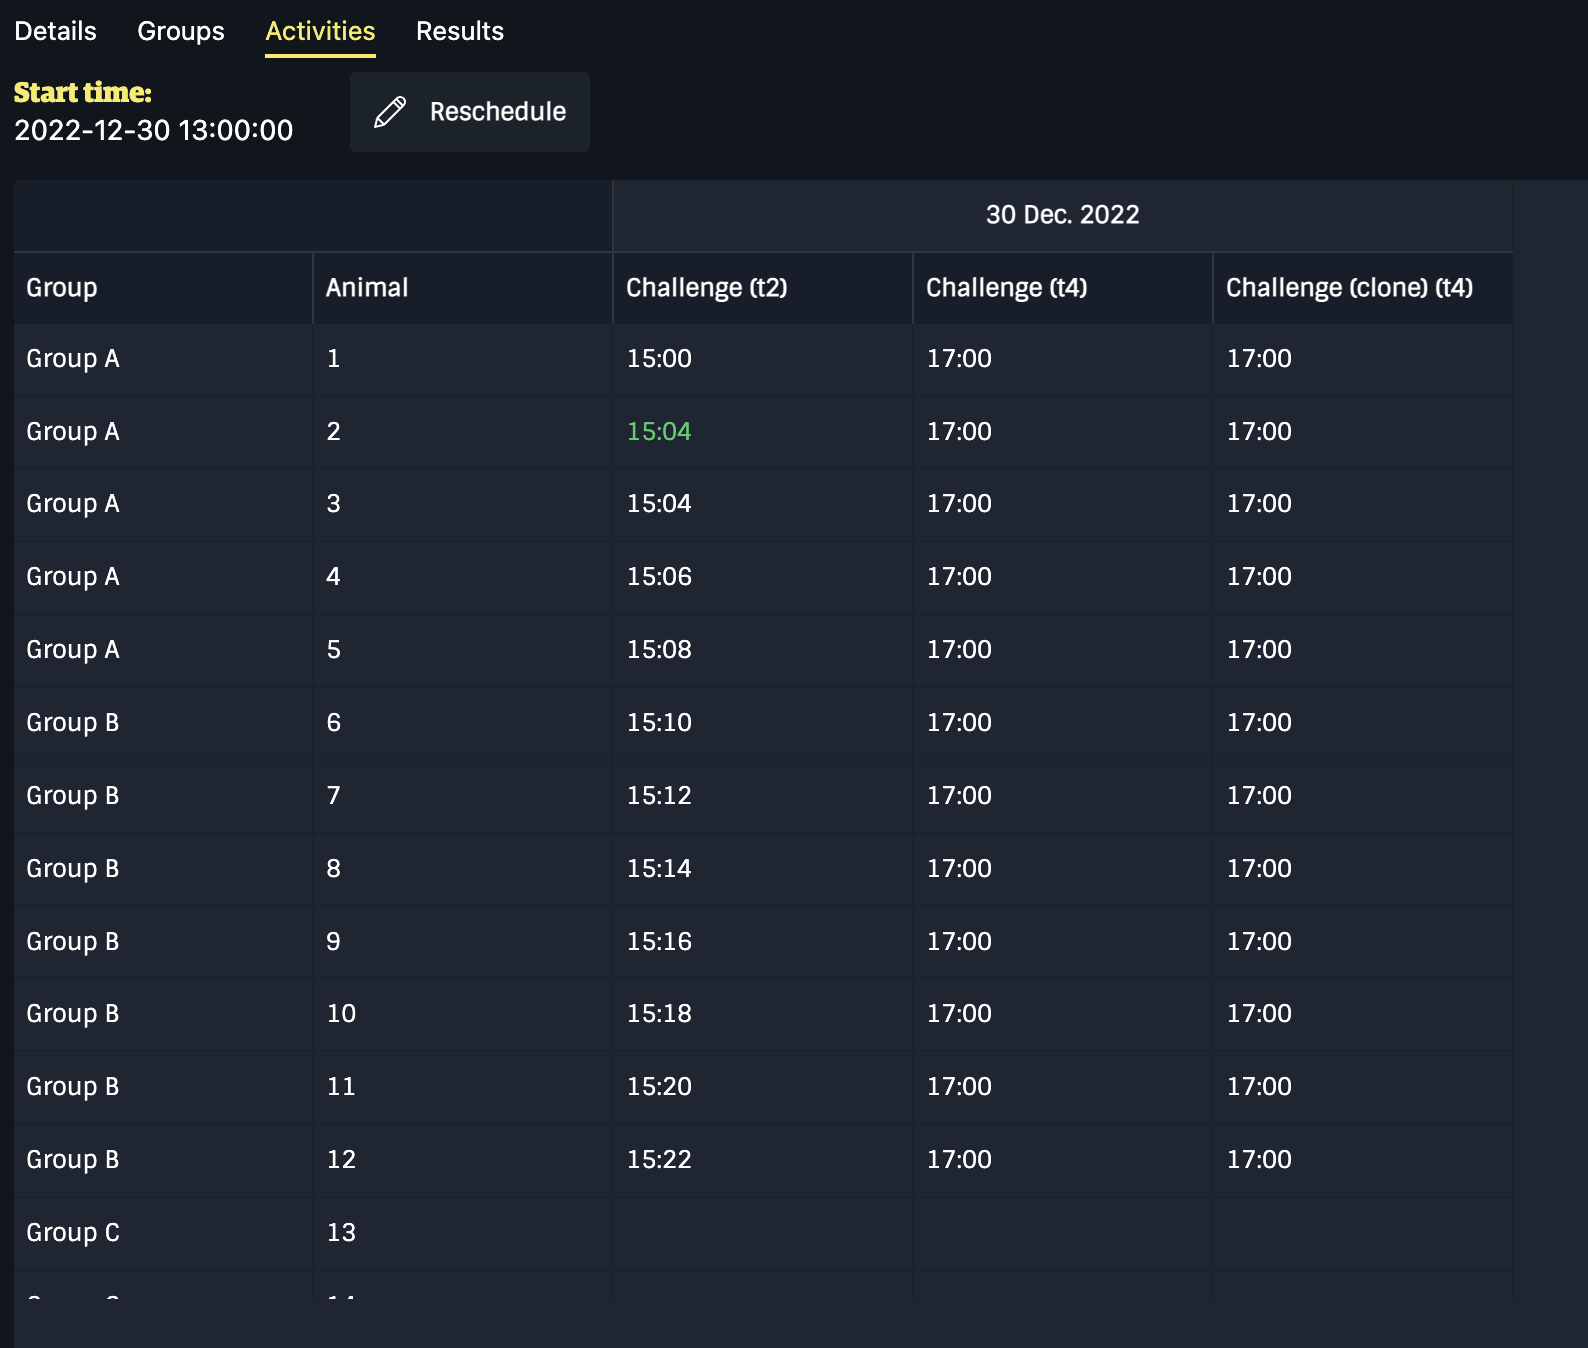
When the activities have been created, you can view their expected execution time points in the table on the left, and you can see an overview of all the activities in the table on the right.

If you want to quickly make a duplicate of an existing activity, you can use the clone button on the right side of the rows.

Exporting and importing activites
It is possible to export activities from one study to another. To export, simply just click the top-right export button in the toolbar on the Activities tab. The export is in a tab separated format, that can be edited.
To import, click the top-right Import button on the Activities tab. The import function is rather forgiving, just showing warnings about data it can not import instead of not importing data if there are errors. Sample types, animal numbers and group names can vary from study to study, and might not match when importing.
Editing timepoints
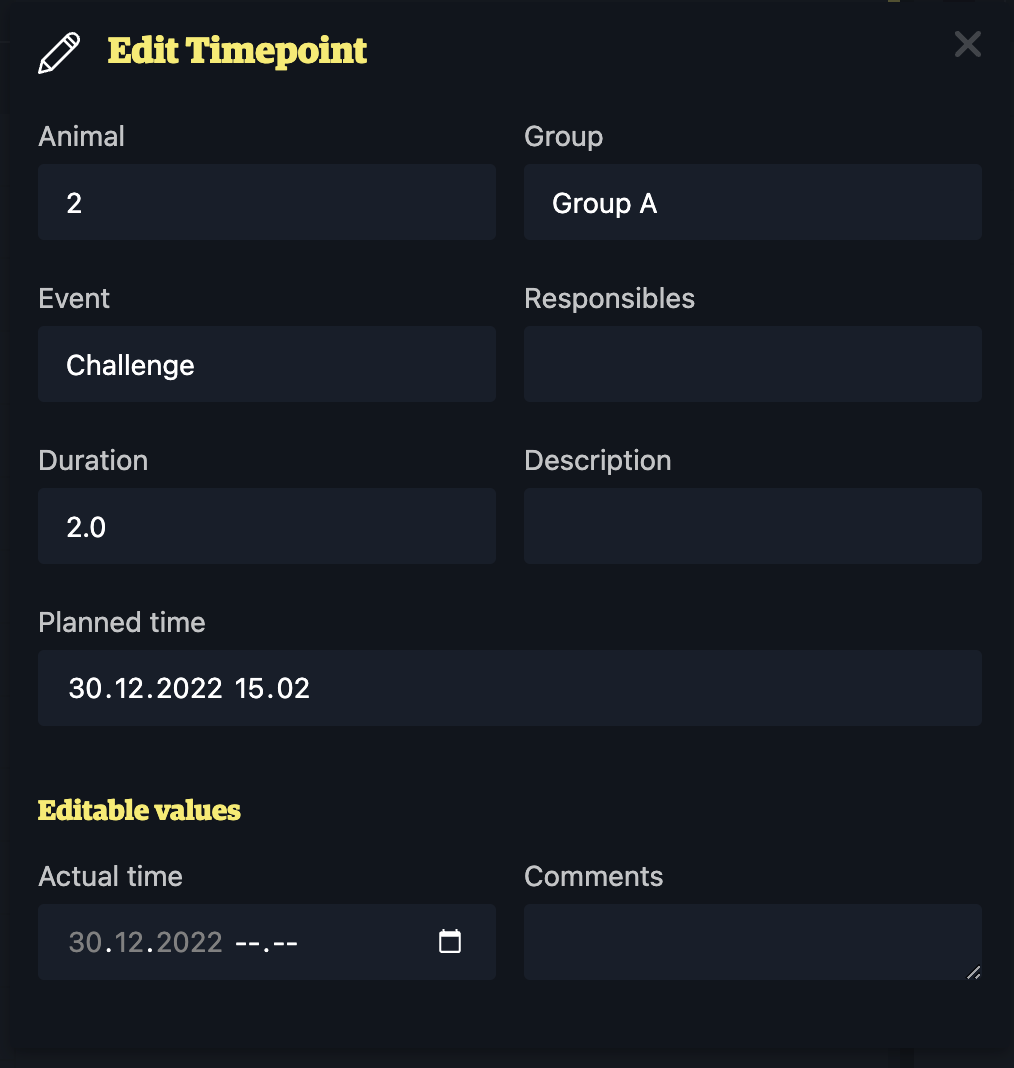
When clicking on an individual time point (in the left table), a form will appear showing you details about the specific activity time point.
You will also have the ability to leave a comment or change the actual time of execution.
Note: As of now, you are only allowed to change the actual time, to a time on the same day as the planned execution.
Timepoints with comments or changes to the actual time, will be marked with green in the table. As shown in the image below:
In-life data (Invivo)
This is a spreadsheet-like page where Observation type activities can be recorded for each animal. For example if an Observation activity have been created to monitor the bodyweight of the animals, a column for each timepoint to observe is created. Values can then be typed into the grid. The below screenshot shows an example of an Observation activity on the body weight.
When the activities have been created, the In-life data grid will look like this:

The body weight will have columns for 0, 24 and 48 hours.
To enter or edit values, click a cell in the table. You can navigate around in the table by hitting the return button on your keyboard and then move around with the arrow buttons. Hit return again to edit a cell.
Samples (Invivo)
This page list auto generated samples with unique identifiers. Samples are generated when Sample type activities are created.
Results (Invivo & Invivo light)
Results are shown for sub result-type experiments that share the same study id. This requires the sub-experiments to have a constant parameter with the plugin_name cs_studyid in their result setup. When result values are registered and published, they show up on the Results tab, ordered by setup.
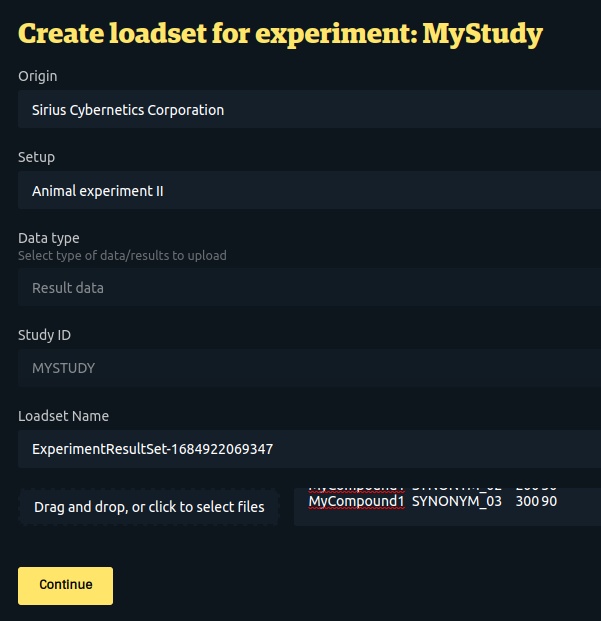
To import sub-result data, go to the Results tab and click the import button in the top-right toolbar. You are then taken to the normal import page. Here you have to choose the Origin of the data, choose a setup and paste the data or pick a CSV file with the data.
Notice that the study id of the invivo study is pre-selected in the form. When the data is loaded, the new sub-experiment will automatically have the study id set and therefore be linked to the study.